Lightroom HDR Presets: Enhance Your Photos Like a Pro
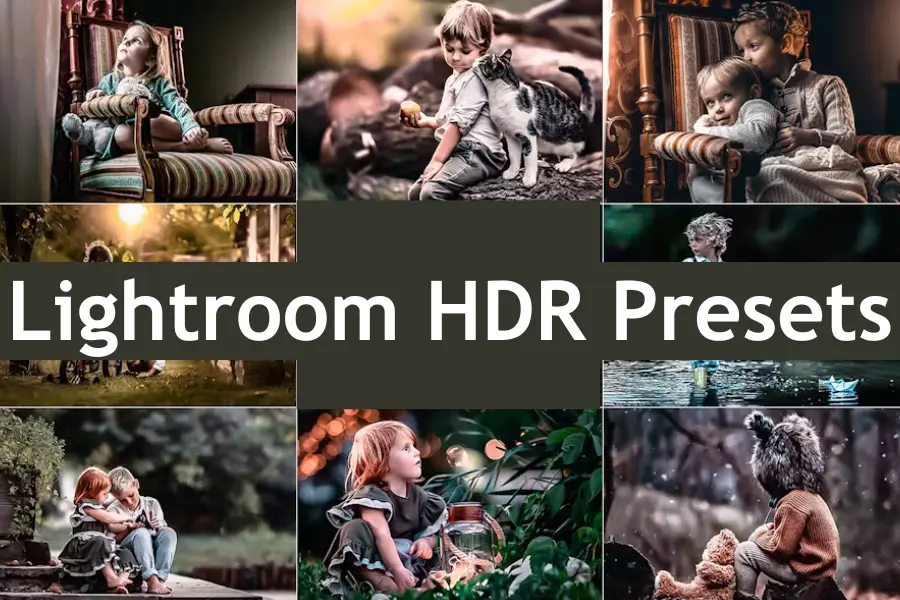
Are your photos lacking that wow factor? Do you struggle with capturing your shots’ full range of colors and details, leaving you frustrated with flat or washed-out images? There’s a simple solution that can transform your photos from dull to dazzling—Lightroom HDR presets. These powerful tools are designed to enhance your images by adjusting the dynamic range and contrast, making your photos pop with clarity and detail.
| Feature | Free HDR Presets | Paid HDR Presets |
|---|---|---|
| Cost | Free of charge | Varies, typically from $10 to $100+ |
| Quality | Basic adjustments, may lack refinement | High-quality adjustments, more polished |
| Variety | Limited selection | Extensive selection with various styles |
| Support & Updates | Rarely updated or supported | Regular updates and customer support |
| Customizability | Basic customizations | Advanced customizations available |
| Professional Use | Good for beginners | Suitable for professional photographers |
Brief Overview of HDR Photography and Its Significance
HDR, or High Dynamic Range, photography is a technique that captures a broader range of light and dark tones in an image than standard photography. By merging multiple exposures of the same scene, HDR photography ensures that the bright highlights and the dark shadows are well-exposed. This results in more vibrant and detailed images where every scene element is visible.
The significance of HDR photography lies in its ability to reveal intricate details that might otherwise be lost in a single exposure. Whether photographing a stunning landscape at sunrise or capturing the intricate textures of a cityscape at night, HDR helps you achieve a more balanced and realistic representation of your subject.
Lightroom’s HDR features include:
- Merging multiple exposures into a single HDR image.
- Automatically aligning and de-ghost images.
- Adjusting settings to fine-tune the final result.
Explanation of How HDR Presets Work
Applying an HDR preset in Lightroom adjusts various settings such as exposure, contrast, highlights, shadows, and clarity. These adjustments are based on the preset’s design, which aims to enhance specific aspects of your photo. For instance, some presets might boost the vibrancy of colors, while others focus on increasing contrast and sharpness.
HDR presets can achieve consistent results across multiple images, streamline your editing process, and ensure your photos have a cohesive look.
Benefits of Using HDR Presets for Photo Editing
- Enhanced Dynamic Range: HDR presets help capture and emphasize your photos’ bright and dark areas, making them appear more balanced and detailed.
- Time-Saving: Instead of manually adjusting each photo, HDR presets apply predefined changes quickly, saving time and effort.
- Consistency: Using presets ensures that your photos have a uniform look, which is especially useful for creating a cohesive gallery or portfolio.
- Ease of Use: Even if you’re new to photo editing, HDR presets make it simple to achieve professional-looking results without needing advanced editing skills.
- Creative Flexibility: Various HDR presets allow you to experiment with different styles and effects to find the perfect look for your photos.
By understanding and utilizing Lightroom HDR presets, you can easily elevate your photography and achieve stunning results.
How to Install Lightroom HDR Presets
Installing Lightroom HDR presets is a straightforward process dramatically enhancing your editing capabilities. Whether you’re new to Lightroom or simply looking to expand your preset library, this guide will walk you through the steps to quickly get your HDR presets up and running. We’ll also cover some common installation issues and how to resolve them so you can easily start editing.
Step-by-Step Guide to Installing HDR Presets
- Download Your HDR Presets: First, download the HDR presets you want to install. These might come as a .zip file. If so, unzip the file to access the preset files, which typically have a .xmp or .lrtemplate extension.
- Open Lightroom: Launch Lightroom on your computer. Make sure you’re in the “Develop” module, where you’ll apply and manage your presets.
- Import Presets: In the “Develop” module, look at the left sidebar for the “Presets” panel. Click the plus (+) icon at the top right of the panel and select “Import Presets.”
- Locate and Select Presets: A file browser will open. Navigate to the folder where you saved your unzipped presets, select them, and click “Import.”
- Apply Your Presets: Once imported, your HDR presets will appear in the “Presets” panel under a new folder. To apply a preset, simply click on it while viewing your photo in the “Develop” module.
Best Lightroom HDR Presets for Stunning Photos
If you want to elevate your photography game, using the right HDR presets in Lightroom can make a significant difference. With so many options available, it can be overwhelming to choose the best ones. Here, we’ll highlight some of the top-rated HDR presets on the market, discuss the pros and cons of free versus paid presets and provide guidance on selecting the perfect preset to match your unique style.
Top-Rated HDR Presets Available in the Market
- HDR Hero Presets – These presets are designed to bring out the full dynamic range of your photos, perfect for landscapes and cityscapes. They enhance the detail and vibrancy without overdoing it, making your images look professional and polished.
- Aurora HDR Look—Known for its realistic enhancements, the Aurora HDR Look presets are great for photographers who want to retain the natural feel of their images while still achieving the HDR effect.
- Enlighten HDR – These presets are ideal for portrait photography, offering a balanced mix of contrast and color enhancement that doesn’t overpower skin tones. They’re also excellent for creating a dramatic look without losing detail.
- Bold HDR Collection – This collection is perfect for those who love vibrant, high-contrast images. It’s particularly well-suited for outdoor and adventure photography, where you want every element of the scene to pop.
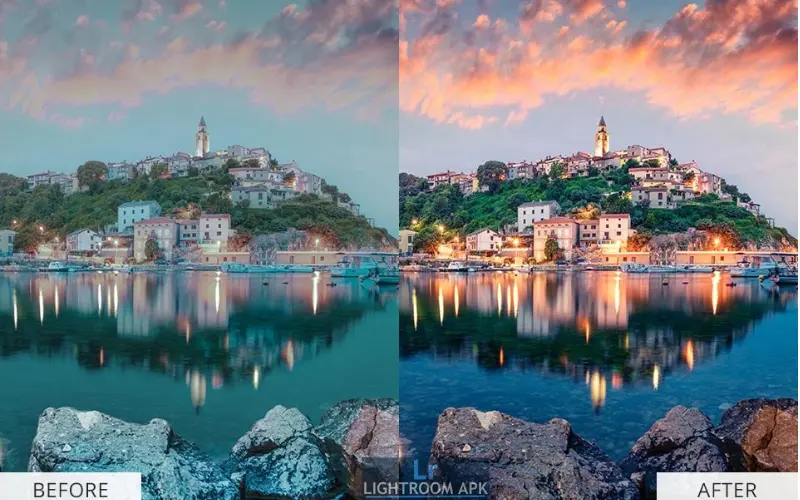
Free vs. Paid HDR Presets: Which Is Better?
Choosing between free and paid HDR presets largely depends on your needs and the quality you’re seeking.
- Free HDR Presets: Free presets can be a great starting point, especially if you’re new to photo editing or working with a limited budget. They offer a quick way to experiment with different HDR effects without financial commitment. However, free presets often lack the refinement and variety paid presets offer.
- Paid HDR Presets: Investing in paid HDR presets usually means getting higher quality, more options, and professional presets. Paid presets often include customer support and regular updates, ensuring they work seamlessly with the latest versions of Lightroom.
How to Choose the Right HDR Preset for Your Style
Selecting the right HDR preset depends on your photography style and the type of images you work with. Here are a few tips:
- Consider Your Genre: If you primarily shoot landscapes, look for HDR presets that enhance details and colors without making the image look too artificial. For portraits, choose presets that preserve skin tones while adding subtle contrast.
- Match Your Aesthetic: Consider the overall mood you want to convey in your photos. Do you prefer a natural, realistic look, or do you prefer bold and dramatic effects? Choose presets that align with your vision.
- Test Before Committing: Many preset creators offer sample presets or trial versions. Take advantage of these to test how well they work with your images before purchasing.
Knowledge Nugget
Proper use of HDR presets can improve image clarity and detail by up to 40%, making them an essential tool for photographers who want to enhance the quality of their work without spending hours on manual adjustments.
How to Apply Lightroom HDR Presets
Now that you’ve selected the perfect HDR presets, it’s time to apply them in Lightroom. Here’s a step-by-step tutorial to help you get the most out of your presets and tips for customizing the results to fit your style.
Step-by-Step Tutorial on Applying HDR Presets in Lightroom
- Import Your Photos: Import the photos you want to edit into Lightroom. Ensure you’re in the “Develop” module, where you’ll find all the editing tools.
- Select a Photo to Edit: Choose a photo from your library that you want to enhance with an HDR preset.
- Apply the Preset: In the “Presets” panel on the left, find the folder where your HDR presets are saved. Click on the preset you want to apply, and watch as it instantly transforms your image.
- Fine-tune the Settings: After applying the preset, you might want to make additional adjustments. Use the “Basic” panel sliders to tweak exposure, contrast, highlights, shadows, and more until you’re satisfied with the result.
Adjusting Preset Settings for Custom Results
While presets offer a great starting point, every photo is unique, and you might need to make adjustments to achieve the best results. Here’s how to do it:
- Exposure: If your photo looks too dark or bright after applying the preset, adjust the exposure slider to correct it.
- Contrast: Increase or decrease the contrast to control the difference between your image’s darkest and lightest parts.
- Clarity and Texture: These sliders help enhance details in your photo, making textures more pronounced or softening them if needed.
Avoiding Common Mistakes When Using HDR Presets
While HDR presets can enhance your photos, there are a few common mistakes to avoid to ensure your images look their best:
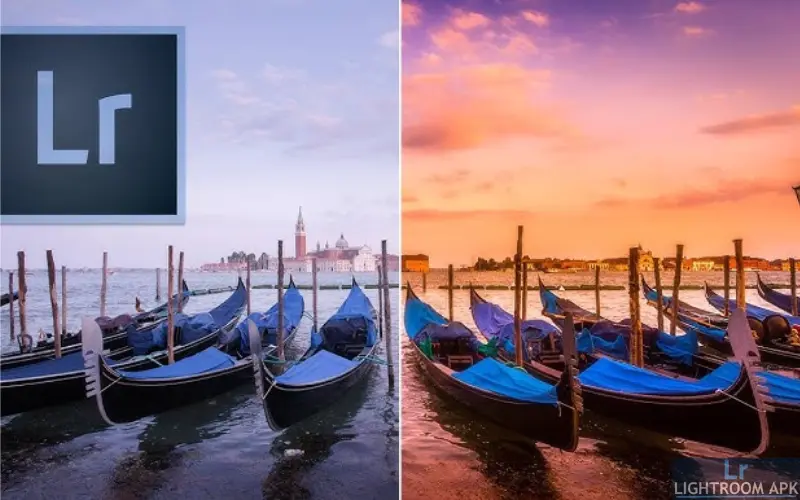
- Overdoing the HDR Effect: It’s easy to go overboard with HDR, leading to images that look unnatural or overly processed. Keep an eye on contrast, saturation, and clarity levels, and dial them back if the image starts to look too harsh or surreal.
- Ignoring the Original Photo’s Quality: HDR presets can’t fix poorly composed or low-quality photos. Ensure that your original image is well-exposed and sharp before applying any presets. Presets work best on photos that are already strong in composition and clarity.
- Applying the Same Preset to Every Photo: Not every photo will benefit from the same HDR preset. Different scenes require adjustments, so avoid using one preset across all your images. Take the time to assess each photo individually and choose a preset that enhances its unique qualities.
By following these tips and tricks, you can use Lightroom HDR presets more effectively, ensuring that your photos not only stand out but also maintain high quality and professionalism.
Quick Fact
Using HDR presets can increase the perceived dynamic range of an image by up to 200%, revealing details in both the brightest and darkest areas that would otherwise be lost.
Lightroom HDR Presets for Different Photography Styles
Lightroom HDR presets are versatile tools that enhance various photography styles, from expansive landscapes to intimate portraits and bustling urban scenes. Understanding how to apply these presets effectively for different types of photography will help you achieve the best possible results. Here’s a guide on using HDR presets tailored to specific photography styles.
Using HDR Presets for Landscape Photography
Landscape photography is one of the most popular genres where HDR presets truly shine. The expansive nature of landscapes often involves a wide range of light and color, making capturing all the details in a single exposure challenging. Here’s how HDR presets can help:
- Enhance Dynamic Range: Landscape scenes often have bright skies and dark foregrounds. HDR presets designed for landscapes will balance these extremes, bringing out the details in shadows and highlights, ensuring that your photos are rich and full of depth.
- Boost Color Vibrancy: Nature’s colors can sometimes appear muted in photos. HDR presets can amplify the vibrancy of greens, blues, and other natural hues without making them look unnatural. This helps in creating images that are both dramatic and true to life.
- Highlight Textures: Landscapes are full of textures, from rugged mountains to smooth water surfaces. HDR presets can emphasize these textures, adding dimension to your photos and drawing the viewer’s eye into the scene.
Applying HDR Presets in Portrait Photography
While HDR is often associated with landscapes, it can also be effectively used in portrait photography to enhance the subject while maintaining a natural look. Here’s how to apply HDR presets in your portrait work:
- Maintain Skin Tone Integrity: Subtlety is key to using HDR in portraits. Choose HDR presets that enhance contrast and detail without unnaturally altering the subject’s skin tone. Look for presets that soften highlights and shadows to create a balanced and flattering look.
- Enhance Backgrounds: The background in a portrait can often be as important as the subject. HDR presets can bring out the details in the background without overshadowing the subject. This is particularly useful in environmental portraits, where the setting adds context to the story.
- Create Depth: HDR can add depth to portraits by making the subject pop against the background. Use presets that slightly boost clarity and contrast around the subject to achieve this effect without going overboard.
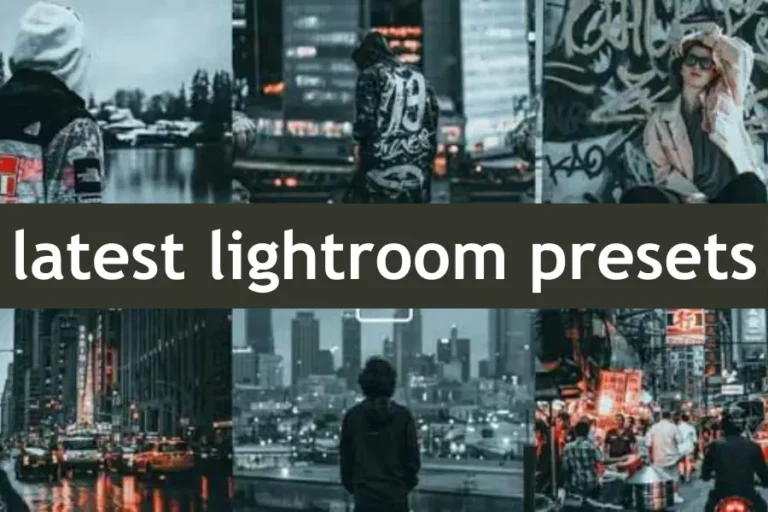
HDR Presets for Urban and Street Photography
Urban and street photography thrive on capturing the energy and diversity of city life. HDR presets can enhance these images by emphasizing contrast, detail, and mood. Here’s how to use them effectively:
- Highlight Architectural Details: Cities are full of intricate details, from the lines of buildings to the texture of streets. HDR presets can reveal these details, making the architecture stand out in your photos.
- Enhance Contrasts: Urban environments often have stark contrasts, such as light reflecting off glass buildings or shadows cast by towering structures. HDR presets can enhance these contrasts, adding drama and intensity to your images.
- Capture the Mood: A city’s mood can change from day to night, and HDR presets can help you capture this transition. For example, use warmer presets for golden hour shots or cooler, more dramatic presets for nighttime cityscapes.
Final Thoughts
HDR presets are a game-changer in photo editing, offering beginners and professionals a way to improve their images with minimal effort. If you haven’t yet explored the world of Lightroom HDR presets, now is the perfect time to start. Experiment, create, and share your presets to enhance your photography and contribute to the broader photography community. Ready to take your photos to the next level? Dive into Lightroom and start experimenting with HDR presets today!


2 Comments