The Best Lightroom Export Settings for High-Quality Images
If you’ve ever spent hours perfecting your photos or videos in Lightroom only to be disappointed by how they look after export. Many users struggle with the right balance between image quality and file size or are confused by the numerous export options.
In this guide, we promise to demystify Lightroom Export Settings, providing clear, step-by-step instructions to ensure your final images and videos look just as stunning as they do in the app. We’ll walk you through the best export settings for every scenario, whether you’re sharing your work online, printing high-quality photos, or creating video content.
| Purpose | File Format | Resolution | Color Space | Quality | Additional Settings |
|---|---|---|---|---|---|
| Web/Social Media | JPEG | 72 PPI | sRGB | 70-80% | Resize to platform-specific dimensions |
| Print (Photos) | TIFF | 300 PPI | Adobe RGB | 100% (Lossless) | Apply sharpening for print |
| JPEG | 72 PPI | sRGB | 70-80% | Resize to 1080×1350 pixels | |
| Large Posters | TIFF | 300 PPI | ProPhoto RGB | 100% (Lossless) | Ensure color accuracy with printer |
| JPEG | 72 PPI | sRGB | 80-100% | Resize to 2048 pixels on the long edge | |
| Video Export (1080p) | MP4 | 1080p | sRGB | High | 30 fps, H.264 codec |
| Video Export (4K) | MOV | 4K | sRGB | High | 24 fps, ProRes codec |
Understanding Lightroom Export Settings
To export your work with the best results, you need to understand the key export settings available in Lightroom. These settings allow you to control how your image or video is saved and viewed.
Explanation of Key Export Settings
- Resolution: This determines the clarity and detail of your image. Higher resolution means more detail, but it also means larger file sizes. 72 PPI (pixels per inch) is standard for web use, while 300 PPI is ideal for print.
- File Format: Lightroom offers several formats, each suited to different purposes. JPEG is great for web use due to its small file size, while TIFF is preferred for high-quality prints due to its lossless nature. PNG is another option, ideal for images with transparent backgrounds.
- Color Space: The color space you choose affects how colors are displayed in your image. sRGB is the most commonly used color space for web images, while Adobe RGB and ProPhoto RGB are better for print and professional use due to their wider color gamut.
Overview of Export Settings Options
- Image Format: Choose from JPEG, PNG, TIFF, DNG, and more. Each format has its strengths, and your choice depends on the image’s final use.
- Quality: When exporting in JPEG, you can adjust the quality percentage. Higher quality preserves more details but results in a larger file size. A setting between 80% and 100% is often recommended for maintaining a good balance between quality and size.
- Color Space: Choose from sRGB, Adobe RGB, or ProPhoto RGB, depending on whether your image will be viewed on the web, in print, or for professional editing.
- Output Sharpening: Lightroom allows you to apply additional sharpening during export. This is particularly useful if your image will be printed or resized for web use.
- Metadata: You can include or exclude metadata in your exported file. This data includes information like camera settings, copyright, and location.
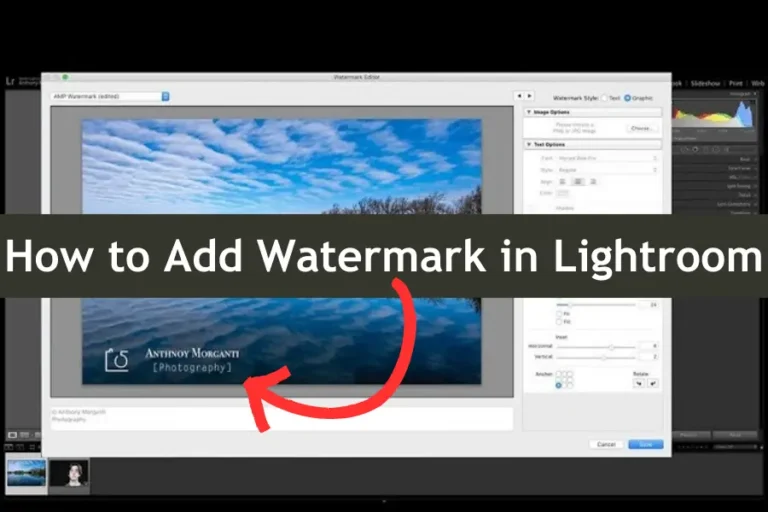
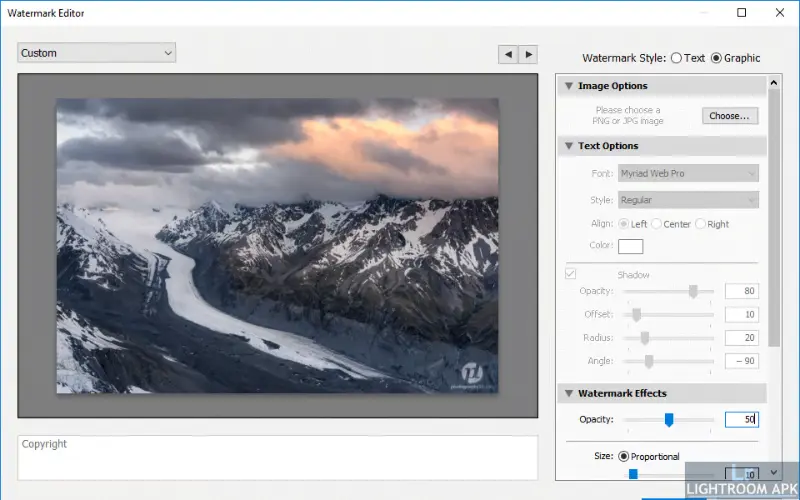
- Watermarking: Add a watermark to protect your work when sharing online. Lightroom lets you customize the watermark’s position, opacity, and size.
Best Lightroom Export Settings for Different Purposes
Getting the right export settings in Lightroom depends largely on what you intend to do with your images or videos. Whether you’re preparing content for the web, printing high-quality photos, or working with video, the settings you choose will affect the outcome.
Export Settings for Web (Social Media, Websites, Blogs)
When exporting images for the web, the focus should be on balancing quality with file size to ensure quick loading times without sacrificing clarity.
- Resolution: 72 PPI (pixels per inch) is standard for web use, balancing quality and file size.
- File Format: JPEG is the best choice for most web images due to its compression capabilities. Set the quality between 70-80% to maintain good detail while keeping file sizes manageable.
- Color Space: sRGB is the preferred color space for web images since it displays consistently across most devices.
- Image Dimensions: To avoid unnecessary scaling, resize your images to the exact dimensions needed for your website or social media platform.
For social media, consider creating a preset that automatically adjusts the dimensions, quality, and file format to match the requirements of platforms like Instagram, Facebook, or Twitter.

Export Settings for Print (High-Quality Prints, Posters)
For print, the priority is on preserving maximum detail and color accuracy.
- Resolution: 300 PPI is ideal for high-quality prints, ensuring your images look sharp and detailed.
- File Format: TIFF is the best option for print due to its lossless nature, ensuring no data is lost during compression. Alternatively, you can use JPEG at 100% quality for smaller file sizes.
- Color Space: Adobe RGB or ProPhoto RGB are recommended for print, as they offer a wider color gamut better suited for professional printing processes.
- Sharpening: Use output sharpening specifically for your print medium, such as matte or glossy paper.
Ensure your printer settings match the color space of your export to maintain color accuracy.
Export Settings for Video (Exporting Stills from Videos, Video Formats)
When working with video in Lightroom, your settings depend on whether you’re exporting stills or full video files.
- Exporting Stills: Use JPEG for web use or TIFF for high-quality print. Keep the resolution at 300 PPI if printing.
- Video Formats: Lightroom supports exporting videos in MP4 or MOV formats. Choose the format that best suits your needs—MP4 for the web and MOV for higher-quality playback.
- Quality Settings: For videos, ensure you export at the highest quality available to maintain clarity, especially when sharing on larger screens.
File Size Impact
Reducing JPEG quality from 100% to 80% can decrease file size by up to 50%, with minimal noticeable impact on image quality. This is particularly useful for web optimization, where faster load times are critical.
How to Choose the Right File Format
Selecting the right file format is crucial, as it influences the quality, file size, and usability of your images or videos. Here’s a quick guide to help you decide:
Differences Between JPEG, PNG, TIFF, and DNG
- JPEG is best for web use due to its small file size and decent quality after compression. However, it’s a lossy format, meaning some data is lost during compression.
- PNG: Ideal for images with transparent backgrounds. It offers lossless compression and preserves image quality, resulting in larger file sizes than JPEG.
- TIFF: This lossless format is preferred for high-quality prints. It maintains all image data, making it perfect for professional use, though it results in significantly larger files.
- DNG: A type of RAW file format that preserves the maximum amount of data from your camera sensor. Best used when further editing is expected, as it offers the most flexibility.
When to Use Each Format (Based on the Purpose of the Export)
- JPEG: This format is used for web and social media uploads, where quick loading times are essential and file size must be minimized.
- PNG: Choose images that require transparency or need to be shared with higher quality but still for web use.
- TIFF: Ideal for printing photos, especially when working with professional printers or when no further editing is required.
- DNG: Opt for DNG to preserve all details for future edits or if you’re working with professional-grade projects that demand the highest quality.
By understanding the differences between these formats and when to use them, you can ensure that your exported files meet the highest quality and functionality standards for their intended purpose.
Color Space and Color Profile Settings
Color space and color profile settings are crucial in how your images appear across different devices and print mediums. Understanding these settings helps ensure your colors remain consistent and true to your vision.
Explanation of Color Spaces (sRGB, Adobe RGB, ProPhoto RGB)
- sRGB is the most widely used color space, ideal for images viewed on screens such as computers, smartphones, and the web. sRGB offers a narrower color gamut compared to Adobe RGB and ProPhoto RGB, but it’s the safest choice for consistent color across different devices.
- Adobe RGB: Adobe RGB offers a wider color gamut than sRGB, making it a better choice for images that will be printed or viewed on high-end monitors. It captures more vibrant colors, especially in greens and blues, but may appear duller when viewed on devices not calibrated for Adobe RGB.
- ProPhoto RGB: ProPhoto RGB has the widest color gamut, capturing even more colors than Adobe RGB. This makes it ideal for professional photographers who require the utmost color accuracy and depth in their images. However, it’s not recommended for everyday use due to potential compatibility issues with non-professional displays.
Choosing the Right Color Space for Your Export
Selecting the right color space depends on where and how your images will be viewed:
- sRGB is the safest and most reliable choice for web and social media. Since most screens and devices are calibrated to display sRGB, using this color space ensures that your images look consistent across different platforms.
- For Print: Adobe RGB is preferable, especially if you’re working with a professional printer that supports this color space. It provides richer and more accurate colors in printed materials.
- For Professional Editing and Archiving: ProPhoto RGB is the best option if you plan to do extensive post-processing or archive your images with the highest possible color fidelity. However, remember to convert to sRGB or Adobe RGB before sharing or printing.
Color Space Usage
Over 80% of images viewed on the web are in the sRGB color space, making it the safest choice for consistency across devices. However, professionals working in print should consider Adobe RGB or ProPhoto RGB, which offer 35% more color accuracy in printed materials.
Resolution and Dimensions: What You Need to Know
Resolution and dimensions are key factors in determining the clarity and quality of your exported images. Understanding these concepts helps you export your work at the appropriate size for its intended use.
Understanding Resolution (PPI vs. DPI)
- PPI (Pixels Per Inch): PPI refers to the number of pixels displayed per inch on a screen. It’s crucial for digital images, as higher PPI results in sharper images. 72 PPI is standard for web use, while 300 PPI is recommended for print.
- DPI (Dots Per Inch): DPI is a printing term that refers to the number of dots a printer can place within an inch—higher DPI results in more detailed prints. While often used interchangeably with PPI, DPI specifically applies to printing and doesn’t directly affect digital image resolution.
Recommended Resolution Settings for Various Output Types (Print, Web, etc.)
- For Web and Digital Displays: Use a resolution of 72 PPI. This is sufficient for web images, ensuring they load quickly without compromising visual quality.
- For Print: Set the resolution to 300 PPI. This higher resolution ensures that your printed images retain sharpness and detail, whether printing small photos or large posters.
- For Large Format Prints: If you’re printing something larger, like a billboard or large banner, you can slightly lower the PPI to around 150-200. Since these prints are viewed from a distance, the slight reduction in resolution won’t be noticeable.
Metadata and Watermarking Options
Metadata and watermarking are essential aspects of the export process in Lightroom, helping you protect your work and maintain its integrity. Understanding these options ensures your images are well-documented and safeguarded against unauthorized use.
Importance of Metadata in Exported Files
Metadata is the information embedded in your images, including details like camera settings, copyright information, location data, etc. It’s crucial for several reasons:
- Copyright Protection: Including metadata with copyright information helps protect your intellectual property by clearly identifying you as the image’s owner.
- Organizational Purposes: Metadata makes it easier to organize, search, and sort your images, both for personal use and when sharing with clients or collaborators.
- Tracking and Attribution: If your images are shared online or used by others, metadata ensures that your work is properly attributed, maintaining your professional reputation.
Lightroom allows you to include or exclude specific metadata during export, depending on your needs. For example, you might exclude location data for privacy reasons or include detailed camera settings if sharing with a photography community.
Adding Watermarks to Your Photos During Export
Watermarking is an effective way to protect your images when sharing them online. Adding a watermark can deter unauthorized use and ensure that your work is always credited to you.
- Custom Watermarks: Lightroom allows you to create custom watermarks with text, images, or logos. You can adjust the watermark’s size, opacity, and position to suit your preferences.
- Placement and Design: When adding a watermark, consider its placement carefully. While it should be visible enough to deter misuse, it shouldn’t distract from the image. Placing it in a corner or along the edge often works well.
- Batch Watermarking: If you’re exporting multiple images at once, you can apply the same watermark to all of them, ensuring consistency across your work.
Including metadata and adding a watermark protects your images while maintaining their professional presentation.
Batch Exporting in Lightroom
When working with large numbers of photos, batch exporting in Lightroom can save you significant time. This feature allows you to apply consistent settings across multiple images, streamlining your workflow.
How to Export Multiple Photos at Once
Exporting multiple photos in Lightroom is straightforward:
- Select Your Photos: In the Library or Develop module, select the photos you want to export. You can do this by holding down the Ctrl (Windows) or Command (Mac) key and clicking on each image.
- Choose Export Settings: Go to File > Export. Set your desired export settings, including file format, quality, resolution, and metadata options. These settings will be applied to all selected photos.
- Export: Click Export, and Lightroom will process all selected images simultaneously, applying your chosen settings.
Best Practices for Batch Exporting
To get the most out of batch exporting, consider these best practices:
- Consistency is Key: Ensure all photos in the batch are edited similarly before exporting. This ensures a cohesive look across your images.
- Use Export Presets: Lightroom allows you to create and save export presets. Creating a preset can save time and ensure consistency if you frequently export images with the same settings.
- Double-check Metadata and Watermarks: Double-check your metadata and watermark settings before exporting. Applying these consistently across a batch ensures that all images are properly credited and protected.
Conclusion: Perfecting Your Lightroom Export Settings
Mastering Lightroom Export Settings is essential for ensuring your photos and videos look their best, no matter where they are displayed. Understanding the importance of resolution, color space, file format, and other key settings allows you to avoid common mistakes and produce high-quality exports every time.
While these guidelines provide a solid foundation, the beauty of Lightroom lies in its flexibility. Don’t be afraid to experiment with different settings to see what works best for your specific needs. Adjust the quality slider, try different color spaces, or tweak the resolution to suit your project. Over time, you’ll develop a set of preferred export settings that perfectly match your workflow and artistic style.
Remember, the goal is to produce images and videos that reflect your creative vision while ensuring they are optimized for their intended use. You’ll become confident in exporting like a pro with practice and some experimentation.

