Learn How to Smooth Skin in Lightroom Like a Pro
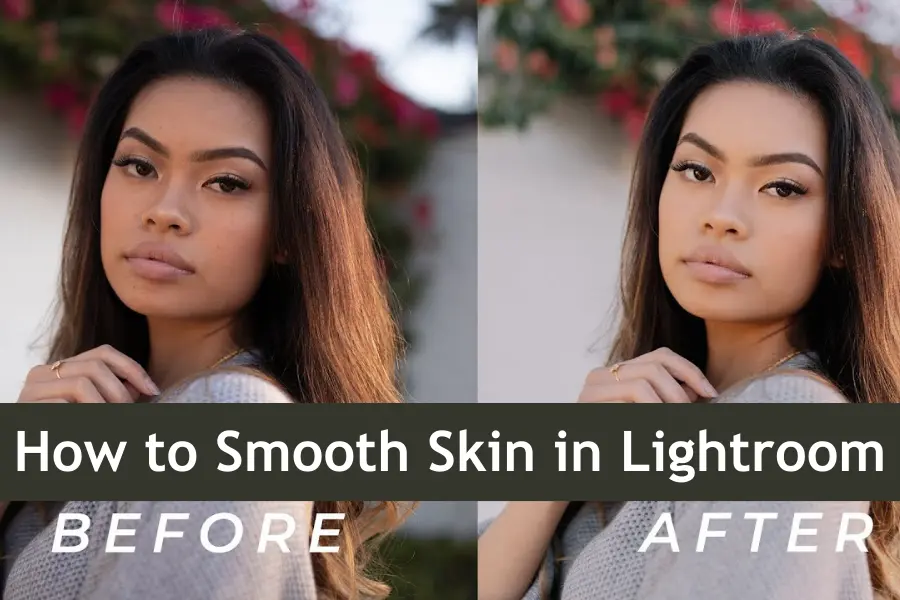
How to Smooth Skin in Lightroom? Many Lightroom users face challenges when it comes to perfecting skin tones and textures, often ending up with results that look unnatural or overly edited. This can be frustrating, especially when you want your portraits to look polished yet still retain a natural feel.
With the right tools and techniques, you can achieve beautifully smooth, natural-looking skin that enhances your photos without sacrificing authenticity. In this guide, I’ll walk you through a step-by-step process that guarantees stunning results. We’ll dive into the exact tools and settings you need to use so you can confidently smooth your skin like a pro. Ready to transform your editing skills? Let’s get started!
| Tool/Setting | Purpose | Usage Tips |
|---|---|---|
| Adjustment Brush | Targeted skin smoothing | Adjust size and feathering for precise application |
| Clarity Slider | Controls midtone contrast | Use sparingly to avoid over-smoothing |
| Texture Slider | Alters the appearance of fine details | Balance with Clarity for natural look |
| Spot Removal Tool | Removes blemishes and spots | Use for specific blemishes before smoothing |
| Dehaze Slider | Reduces haze and enhances overall clarity | Combine with exposure adjustments for glow |
Importance of Skin Smoothing in Photo Editing
Skin smoothing is crucial in photo editing, especially when working with portraits. It helps to reduce the appearance of blemishes, wrinkles, and other imperfections, giving your subjects a clean, flawless look. However, the key to effective skin smoothing is subtlety; you want to enhance the skin without making it look unnatural. By smoothing the skin while retaining texture, you can achieve a balanced, natural finish that enhances the overall quality of your photos. This not only makes your subjects look their best but also elevates the professionalism of your work.
Mention of Other Skin Smoothing Techniques in Lightroom
In addition to the basic skin smoothing techniques, Lightroom offers several other methods to refine your edits. For example, you can use the Texture slider to soften skin without losing too much detail or the Dehaze tool to add a subtle glow to the complexion. The Spot Removal tool is another handy feature, allowing you to eliminate small blemishes and distractions precisely. You can find the perfect combination that works best for your editing style by exploring these various tools and settings. Experimenting with these alternatives will help you master the art of skin smoothing in Lightroom, giving you more control and creativity over your final edits.
Understanding How to Smooth Skin in Lightroom Tools
Lightroom is packed with tools that make skin smoothing both easy and effective. Understanding how to use these tools is key to achieving your photos’ polished, natural look. Let’s dive into the essential tools and settings to help you smooth your skin in Lightroom with precision and finesse.
Introduction to Lightroom’s Editing Modules
Lightroom’s editing capabilities are divided into modules, with the Develop module being the most powerful for photo enhancement. This module houses all the essential tools for adjusting your images, including those specifically designed for skin smoothing.
Overview of the Adjustment Brush Tool
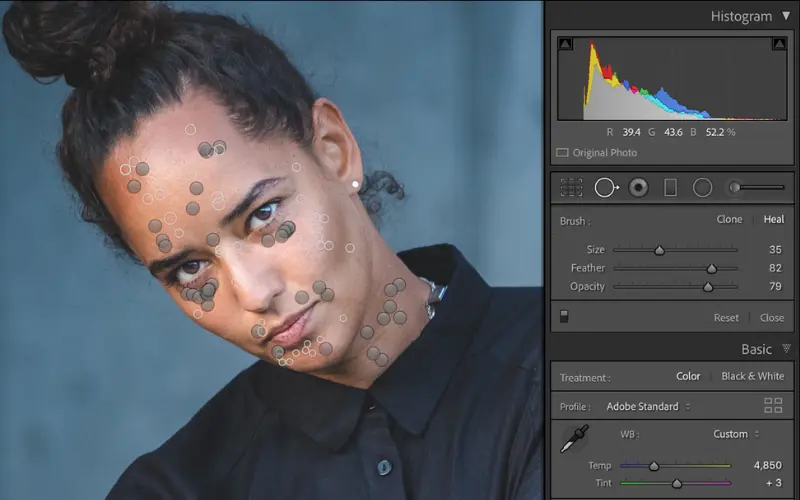
The Adjustment Brush tool in Lightroom is your go-to for selective editing, making it perfect for skin smoothing. With this tool, you can paint over specific areas of the skin that need smoothing, allowing for targeted adjustments. This precision ensures that only the areas that need softening are affected while the rest of the image remains untouched. Adjust the size and feather of the brush to match the area you’re working on, giving you full control over the editing process.
Explanation of Clarity, Sharpness, and Texture Sliders
Three key sliders in Lightroom—Clarity, Sharpness, and Texture—are crucial for achieving smooth skin.
- Clarity: Reducing the Clarity slider softens the skin’s overall texture, reducing the appearance of wrinkles and blemishes. A negative value, typically between -40 and -60, works well for most portraits.
- Sharpness: Lowering the Sharpness slider blurs fine details, contributing to a smoother skin appearance. This setting should be used sparingly to avoid making the skin look overly soft.
- Texture: The Texture slider offers more subtle control, allowing you to soften the skin without losing too much detail. A slight reduction in Texture (-10 to -20) can make the skin appear smoother while preserving natural features.
Additional Tools and Settings for Achieving Smooth Skin
Beyond the basics, Lightroom offers additional tools to enhance your skin-smoothing process. The Spot Removal tool is excellent for eliminating small blemishes and imperfections, providing a clean canvas for further editing. Additionally, using the Dehaze tool with a slight reduction can add a soft glow to the skin, giving it a more vibrant and healthy appearance.
You can also explore creating custom Presets to save your favorite settings for skin smoothing. These presets can be applied to multiple images with a single click, speeding up your workflow and ensuring consistency across your edits.
Combining these tools and settings allows you to achieve a smooth, natural skin finish in Lightroom that enhances your photos without making them look over-edited.
Knowledge Nugget
The Texture slider is specifically designed to alter fine details and skin texture, providing a more refined touch compared to the Clarity slider.
Step-by-Step Guide How to Smooth Skin in Lightroom
How to Smooth Skin in Lightroom? Smoothing skin in Lightroom can transform your photos, giving them a professional touch. Here’s a concise, step-by-step guide to help you achieve the perfect skin-smoothing effect.
Preparation: Importing and Selecting Your Photo
Before you start editing, import your photo into Lightroom. This process is straightforward—drag and drop your image into the Lightroom library or use the import button. Once your photo is in, please select it and head to the Develop module, where all the editing magic happens. This step ensures you’re working with the highest quality version of your photo.
Detailed Steps on Using the Adjustment Brush
- Activate the Adjustment Brush: Locate the Adjustment Brush tool on the right-hand panel in the Develop module. Click on it to activate the tool.
- Adjust the Brush Settings: Set the brush size according to the area you want to smooth. Use the Feather setting to soften the edges of the brush, ensuring a smooth transition between the edited and the unedited regions.
- Paint Over the Skin: Carefully paint over the areas of the skin you want to smooth. Avoid detailed areas like the eyes, lips, and hair to maintain natural sharpness in those regions. This step allows you to target only the areas that need smoothing.
Using the Clarity Slider to Soften Skin Texture
After selecting the skin with the Adjustment Brush, it’s time to use the Clarity slider:
- Lower the Clarity: Drag the Clarity slider to the left (negative values) to reduce the skin’s texture. A setting between -40 and -60 typically works well for most skin types. This reduces harsh details, making the skin look smoother and softer without losing its natural appearance.
Refining the Effect with the Texture Slider
Next, refine the skin smoothing effect using the Texture slider:
- Fine-Tune with Texture: Lower the Texture slider slightly to smooth the skin further without blurring essential details. A value between -10 and -20 usually achieves a good balance, softening the skin while maintaining its natural look. This step ensures that your edit doesn’t make the skin appear too flat or artificial.
Masking Techniques for Precise Edits
To ensure your skin smoothing is precise and doesn’t affect areas you want to keep sharp:
- View the Mask Overlay: Press the O key to view the mask overlay, which shows exactly where you’ve applied the adjustments. This helps you refine your selection, ensuring you haven’t smoothed areas like the eyes or hair.
- Refine the Mask: If needed, adjust the mask using the Erase brush to remove unwanted areas from the smoothing effect. This level of precision ensures that your edits look natural and focused.
Additional Adjustments for Natural-Looking Skin
To finalize the skin smoothing and ensure a cohesive look across your photo:
- Balance the Exposure and Contrast: Adjust the overall exposure and contrast to match the smoothed areas with the rest of the image. This helps the skin blend seamlessly with the other elements in the photo.
- Check the Overall Image: Zoom out to view the entire image and make any final tweaks to the skin smoothing. Use the Spot Removal tool to address any remaining blemishes or imperfections.
Following these steps, you’ll achieve beautifully smooth, natural-looking skin in Lightroom, enhancing your portraits with a professional finish. Practice makes perfect, so don’t hesitate to experiment with these tools to find the settings that work best for you.
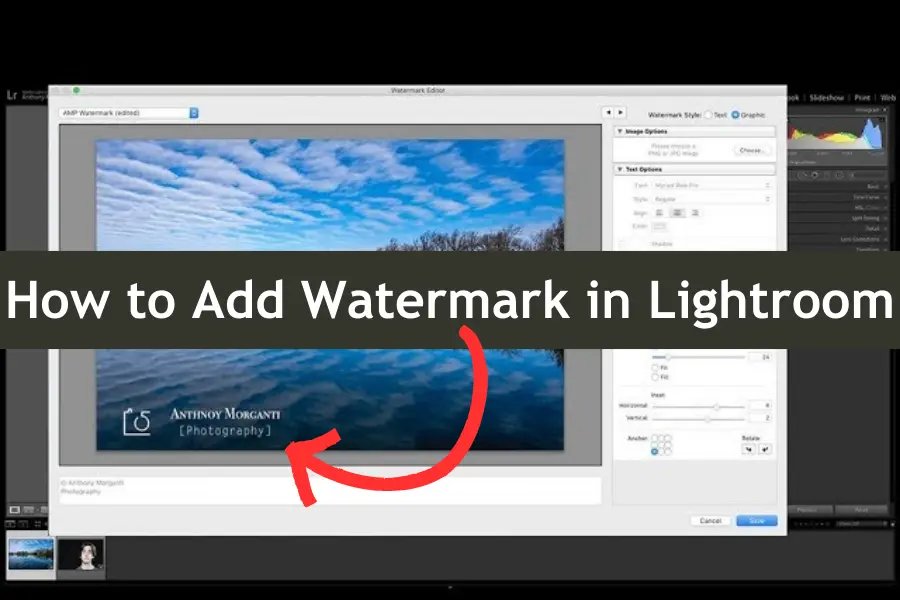
How to Add Watermark in Lightroom for Your Photography
How to Smooth Skin in Lightroom Advanced Techniques
How to Smooth Skin in Lightroom? Once you’ve mastered the basics of skin smoothing in Lightroom, it’s time to explore advanced techniques that can take your edits to the next level. These methods will help you achieve consistent, professional results with minimal effort.
Utilizing Lightroom Presets for Consistent Results
Presets are a powerful tool in Lightroom, allowing you to apply consistent edits across multiple photos with a single click. You can create your own preset for skin smoothing by saving your favorite adjustment settings. This ensures that you start with a solid foundation every time you edit a portrait, saving you time and ensuring uniformity across your images. Presets can be especially useful if you have a particular style or look that you want to maintain in all your edits.
Combining Dehaze and Exposure Adjustments for a Glowing Complexion
For an added touch of brilliance, try combining the Dehaze and Exposure adjustments:
- Dehaze: Lowering the Dehaze slider slightly can add a soft, glowing effect to the skin, giving it a fresh and vibrant look. This adjustment works particularly well for outdoor portraits where the light may be a bit harsh.
- Exposure: Pair this with a subtle increase to brighten the overall image. Be careful not to overdo it; the goal is to enhance the skin’s natural glow without washing out the details.
These combined adjustments can give your subjects a healthy, radiant appearance, making the skin look luminous and full of life.
Advanced Tip
Combining the Dehaze and Exposure sliders can enhance skin glow by improving overall clarity and brightness, but this should be done carefully to avoid overexposure.
Removing Blemishes with the Spot Removal Tool
The Spot Removal tool is indispensable for cleaning up any blemishes or imperfections after skin smoothing. This tool allows you to precisely target small spots, acne, or other distractions that can detract from your photo:
- Heal vs. Clone: The Heal option is best for most skin corrections, as it blends the correction naturally with the surrounding skin. The Clone option is more rigid and can be used for larger, more consistent areas.
- Refine the Edits: After removing blemishes, zoom in to ensure the corrections blend seamlessly with the rest of the skin. This extra step ensures a polished, professional finish.
Tips for Achieving a Professional Finish
To wrap up your skin smoothing process, follow these tips to ensure your final image is as polished as possible:
- Check Before and After Always compare your edited photo with the original using Lightroom’s before-and-after feature. This helps you see how far you’ve come and ensure your edits enhance rather than detract from the original image.
- Use the Right Tools: Combine tools like the Adjustment Brush, Spot Removal, and Dehaze to refine your edits. Don’t be afraid to use multiple tools in tandem to achieve the best results.
- Keep it Natural: Less is often more regarding skin smoothing. Aim for edits that enhance natural beauty without making the skin look artificial. A light touch is key to achieving a professional, polished look.
Conclusion
How to Smooth Skin in Lightroom? Achieving smooth, flawless skin in Lightroom is a powerful way to enhance your photos and create professional-looking results. By mastering the tools and techniques available, you can significantly improve the quality of your portrait edits. Here’s a recap of the key points to remember:
Don’t be afraid to experiment with different settings and techniques to find what works best for your style. Practice is key to mastering skin smoothing in Lightroom. The more you experiment, the better you’ll understand how to perfectly balance smoothness and natural texture.


