How to Remove Objects in Lightroom [Learn New Techniques]
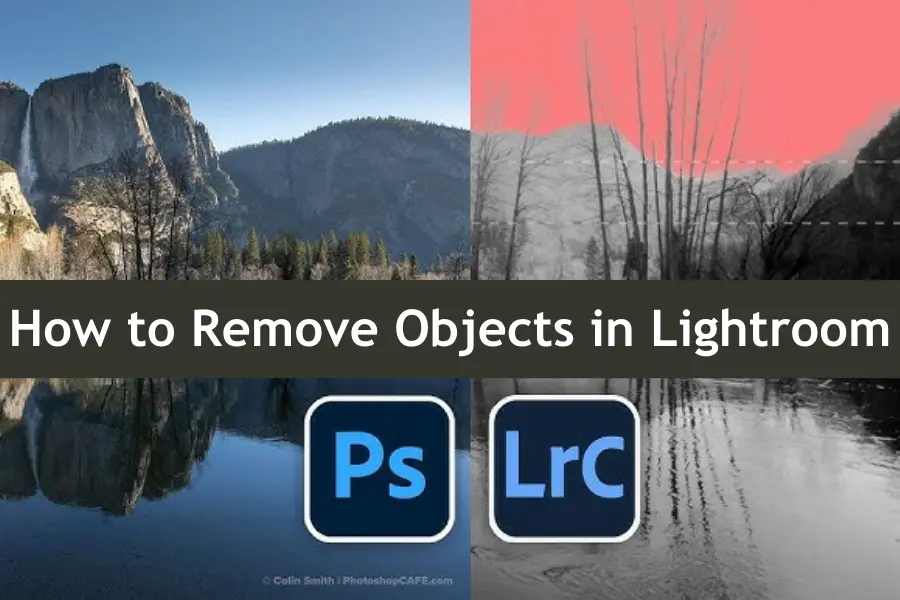
You capture the perfect shot, only to realize later that there’s an unwanted object ruining your photo. Whether it’s a stray person in the background, an unsightly blemish, or a distracting piece of clutter, these elements can take away from the beauty of your image. It can be incredibly frustrating, especially when striving for a flawless edit.
The good news is that Lightroom, the powerful photo and video editor app, has all the tools you need to make these unwanted objects disappear. In this article, I will walk you through exactly How to Remove Objects in Lightroom, step by step. You’ll learn to use Lightroom’s intuitive tools like the Healing Brush, Clone Stamp, and Content-Aware Fill to edit your photos, leaving them polished and professional seamlessly.
| Tool | Primary Use | Best For | Key Features |
|---|---|---|---|
| Healing Brush Tool | Blends surrounding pixels to remove objects | Small imperfections, blemishes | Auto-blending, easy to use, quick fixes |
| Clone Stamp Tool | Copies pixels exactly from one area to another | Precision edits, complex backgrounds | Greater control, matches textures, manual adjustments |
| Content-Aware Fill | Automatically fills removed areas with surrounding pixels | Large objects, uniform backgrounds | Intelligent fill, minimal manual input, time-saving |
| Virtual Copies | Non-destructive editing | Experimenting with edits | Creates duplicates without affecting the original |
| Output Sharpening | Enhances final image clarity during export | Web and print output | Customizable sharpening settings for different mediums |
Understanding the Healing Brush Tool
The Healing Brush tool in Lightroom is one of the most user-friendly ways to remove objects from your photos. It works by sampling pixels from the surrounding area and blending them over the unwanted object. This tool effectively removes small imperfections like blemishes, dust spots, or small distractions.
Overview of the Healing Brush Tool in Lightroom
The Healing Brush tool is designed to fix minor imperfections by copying the texture, lighting, and shading from one part of your image to another. It’s a quick, easy solution for small edits and perfect for beginners. With just a few clicks, you can remove distractions and refine your image to make it look flawless.
How It Works for Object Removal
To use the Healing Brush, select the tool, then click and drag over the object you want to remove. Lightroom will automatically replace the selected area with a blend of pixels from the surrounding environment. The tool intelligently matches the texture and lighting to create a seamless edit, making the object virtually disappear.
Tips for Effective Use of the Healing Brush
- Zoom In: For better precision, zoom in on the area you want to edit. This will help you control the tool more effectively.
- Use Small Strokes: Instead of removing the object in one go, use smaller strokes to blend the area gradually. This prevents noticeable patterns and ensures a smoother finish.
- Adjust Brush Size: Make sure the brush size is slightly larger than the object you remove. This helps Lightroom blend the edges more naturally.
- Refine with Clone Stamp: If the Healing Brush doesn’t fully achieve the desired result, use the Clone Stamp tool to refine the area and ensure a perfect match.
By mastering the Healing Brush tool in Lightroom, you can remove objects quickly and effectively, enhancing your photos and making them stand out.
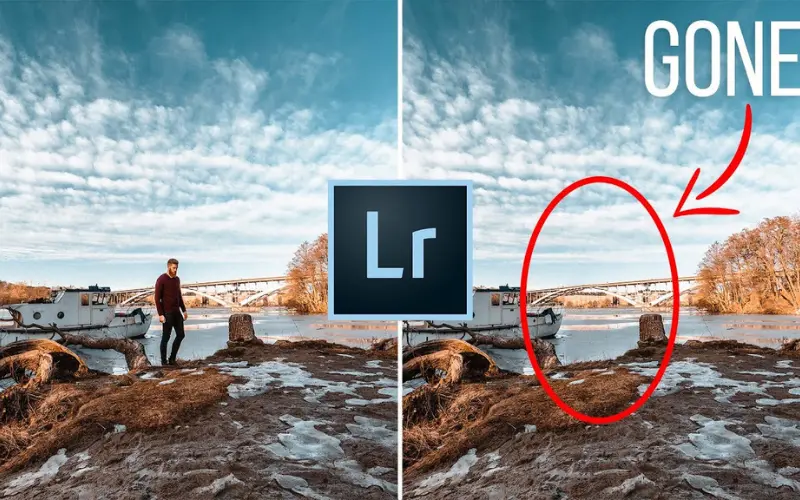
Using the Clone Stamp Tool for Precision
The Clone Stamp tool is another powerful feature in Lightroom that offers more precision than the Healing Brush, especially for larger or more complex objects. It works by copying pixels from one part of the image and applying them directly over the unwanted object, making it ideal for detailed edits.
Introduction to the Clone Stamp Tool
The Clone Stamp tool is designed for situations where the Healing Brush might struggle. While the Healing Brush blends pixels, the Clone Stamp replicates them exactly, giving you more control over the editing process. This makes it perfect for removing objects near complex backgrounds or edges where blending might not be sufficient.
Differences Between Healing Brush and Clone Stamp
While both tools are used for object removal, the Healing Brush is best for blending minor imperfections, whereas the Clone Stamp is ideal for precise edits. The Clone Stamp doesn’t blend pixels; it directly copies them, making it more suitable for detailed work where the surrounding area has distinct patterns or textures.
Step-by-Step Guide on Using the Clone Stamp for Object Removal
- Select the Clone Stamp Tool: Choose the Clone Stamp tool from the toolbar. Adjust the brush size to match the object you’re removing.
- Choose a Source Area: Hold down the ‘Alt’ key (or ‘Option’ on Mac) and click on the area you want to use as the source. This should be a part of the image that closely matches the background around the object.
- Apply the Clone Stamp: Click and drag the tool over the object you wish to remove. Lightroom will replace the selected area with the pixels from your source area.
- Refine the Edit: If necessary, adjust the opacity or size of the brush to fine-tune the edit. Afterward, you can also use the Healing Brush to blend the edges and ensure a seamless finish.
Mastering the Clone Stamp tool can increase the precision of your edits, making it an essential tool for complex object removal.
Knowledge Nugget
Lightroom’s History panel is a unique feature that allows users to review every single edit made to a photo. This non-destructive editing process is crucial for experimenting with different techniques without losing the original image quality.
The Power of Content-Aware Fill
Content-Aware Fill is another game-changing feature in Lightroom that takes object removal to the next level. It uses advanced algorithms to automatically fill in the gaps left by removed objects, making the process faster and more intuitive.
Explanation of Content-Aware Fill in Lightroom
Content-Aware Fill analyzes the surrounding pixels and intelligently fills in the area where an object has been removed. It considers patterns, colors, and textures to create a natural-looking fill, minimizing the need for manual adjustments. This tool is incredibly efficient, especially for larger areas or when the background is more uniform.
How It Simplifies Object Removal
The beauty of Content-Aware Fill is its simplicity. Instead of spending time carefully blending or cloning, you can rely on Lightroom to do most of the work. It’s perfect for quick edits where you need to remove an object and have the area seamlessly filled without fuss.
Scenarios Where Content-Aware Fill is Most Effective
- Uniform Backgrounds: Content-Aware Fill excels in areas with consistent textures, such as skies, water, or grassy fields, where the surrounding pixels can be easily replicated.
- Large Object Removal: When dealing with larger objects, Content-Aware Fill can save time by automatically filling in the area, reducing the need for detailed manual edits.
- Complex Patterns: Content-Aware Fill can accurately replicate and extend these elements for patterns or repetitive textures, ensuring a seamless edit.
Incorporating Content-Aware Fill into your workflow can drastically reduce the time spent on object removal, allowing you to focus on other aspects of your photo editing.
This expanded content provides a comprehensive guide on using Lightroom’s tools for object removal, ensuring that readers are equipped with the knowledge to edit their photos like a pro. Let me know if you need further sections or additional details!
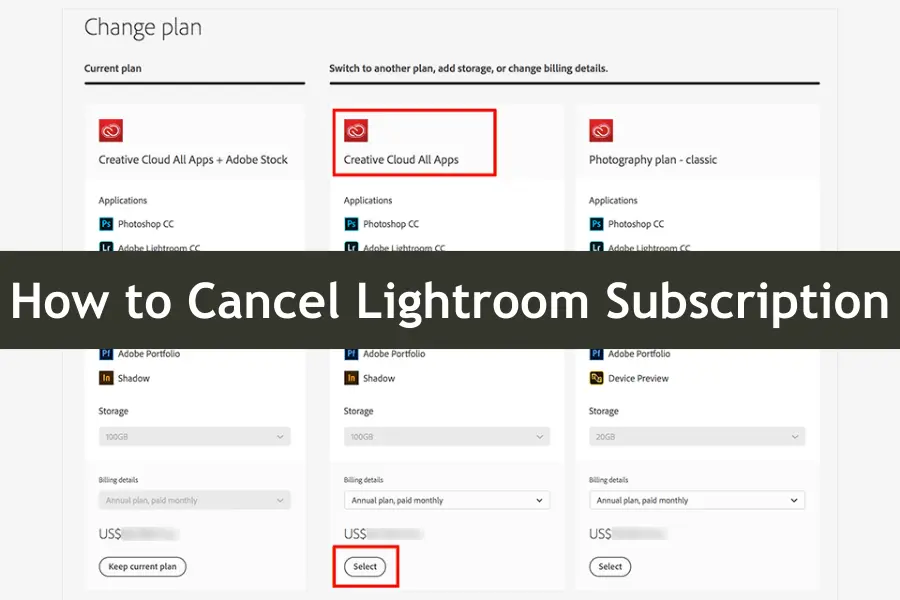
How to Cancel Lightroom Subscription on Android, iOS & Desktop
Step-by-Step Guide: How to Remove Objects in Lightroom
Removing objects in Lightroom is straightforward when you know the right tools and techniques. Follow this step-by-step guide to achieve clean, professional-looking edits every time.
Detailed Process Using the Healing Brush Tool
- Open Your Photo in Lightroom: Select the photo you want to edit. Zoom in on the area where the unwanted object is located for better precision.
- Select the Healing Brush Tool: Choose the Healing Brush tool from the toolbar. Adjust the brush size so it’s slightly larger than the object you’re removing.
- Apply the Healing Brush: Click on the object and drag the tool over it. Lightroom will automatically blend the surrounding pixels to cover the object. If the first attempt isn’t perfect, undo it and try again with smaller strokes.
- Review Your Edit: Once the object is removed, zoom out and review your work. The Healing Brush should have seamlessly blended the area.
When to Switch to the Clone Stamp Tool
The Healing Brush is great for smaller, less complex objects, but if it’s not delivering the desired result—especially near edges or in areas with distinct patterns—switch to the Clone Stamp tool.
- Activate the Clone Stamp Tool: Select the Clone Stamp tool from the toolbar. Adjust the brush size to match the object you’re targeting.
- Set the Source Area: Hold the ‘Alt’ key (or ‘Option’ on Mac) and click on the area of the image that closely matches the background around the object.
- Apply the Clone Stamp: Carefully paint over the object. The Clone Stamp will copy the selected pixels exactly, giving you greater control over the final result.
- Blend with Healing Brush (Optional): Afterward, you can use the Healing Brush to blend the edges and ensure a smooth transition between the cloned area and the rest of the photo.
Final Touches with Content-Aware Fill
After using the Healing Brush and Clone Stamp, some fine-tuning may still be needed. This is where Content-Aware Fill comes in handy.
- Select Content-Aware Fill: Choose Content-Aware Fill from the menu. This tool will analyze the surrounding area and automatically fill in any gaps the removed object leaves.
- Apply to Larger Areas: For larger areas, drag over the space where the object was removed. Content-Aware Fill will do the rest, making the edit look natural.
- Review and Refine: Once you’ve applied Content-Aware Fill, review the image closely. Make small adjustments with the Healing Brush or Clone Stamp to perfect the edit if needed.
Advanced Tips and Tricks
Once you’ve mastered How to Remove Objects in Lightroom, you can take your editing skills to the next level with some advanced techniques. These tips will help you refine your edits, especially when dealing with more complex or challenging objects in your photos.
Did You Ever Wonder?
85% of Lightroom users prefer using the Healing Brush tool for quick fixes, making it the most popular object removal tool within the app.
Using Layers for Non-Destructive Editing
One of the best practices in photo editing is to work non-destructively, meaning you can always revert to the original image if needed. While Lightroom doesn’t use layers in the same way as Photoshop, you can still achieve a non-destructive workflow by using the following methods:
- Virtual Copies: Create a virtual copy of your photo before you start making significant edits. This allows you to experiment with different object removal techniques without affecting the original image.
- Use the History Panel: Lightroom’s History panel records every edit you make, allowing you to review your changes at any time. This is especially useful when experimenting with different tools.
- Snapshots: Take snapshots at different stages of your editing process. This way, you can compare different versions of your edits or revert to a previous stage without losing your work.
By using these techniques, you can maintain flexibility in your editing process, ensuring that you don’t permanently alter your original photos while working on object removal.
Combining Tools for Complex Removals
Sometimes, removing an object requires more than just one tool. Complex removals often combine the Healing Brush, Clone Stamp, and Content-Aware Fill to achieve a seamless result.
- Start with the Healing Brush: Use the Healing Brush tool to remove the bulk of the object. This tool is great for minor distractions and smaller objects.
- Switch to the Clone Stamp for Precision: If the Healing Brush doesn’t give you the desired result, switch to the Clone Stamp tool for more precision. Use this tool to match textures and patterns around the object carefully.
- Refine with Content-Aware Fill: After using the Healing Brush and Clone Stamp, use Content-Aware Fill to smooth out any inconsistencies. This tool is particularly useful for larger areas or complex backgrounds.
- Blend Edges for a Natural Look: Finally, go back over the edges with the Healing Brush to blend everything. This step ensures that the edited area seamlessly integrates with the rest of the photo.
By combining these tools, you can confidently tackle even the most challenging object removals, knowing that your edits will be smooth and natural.
How to Deal with Challenging Objects
Some objects are more difficult to remove than others, especially those with intricate details or overlapping with complex backgrounds. Here’s how to handle these tricky situations:
- Zoom In for Detail: When dealing with challenging objects, it’s essential to zoom in as much as possible. This gives you better control over the tools and allows you to make more precise adjustments.
- Use Smaller Brush Sizes: Use a smaller brush size with the Healing Brush or Clone Stamp tool for detailed work. This allows you to work around fine details without affecting the surrounding areas too much.
- Tackle the Object in Sections: Instead of removing the entire object immediately, break it down into sections. Remove one part of the object, refine the area, and move on to the next. This method helps maintain the integrity of the surrounding areas.
- Pay Attention to Light and Shadow: Matching the lighting and shadows around the removed object is crucial for a natural look. If your editing area has distinct lighting, ensure the cloned or healed area matches these characteristics.
- Use Feathering for Soft Edges: Feathering helps to soften the edges of your edits, making the transition between the edited and original areas less noticeable. Adjust the feathering settings on your tools to blend the edits smoothly.
By applying these advanced tips and tricks, you can easily handle even the most complex object removals, ensuring your photos are clean, polished, and professional.
Exporting Your Edited Photos
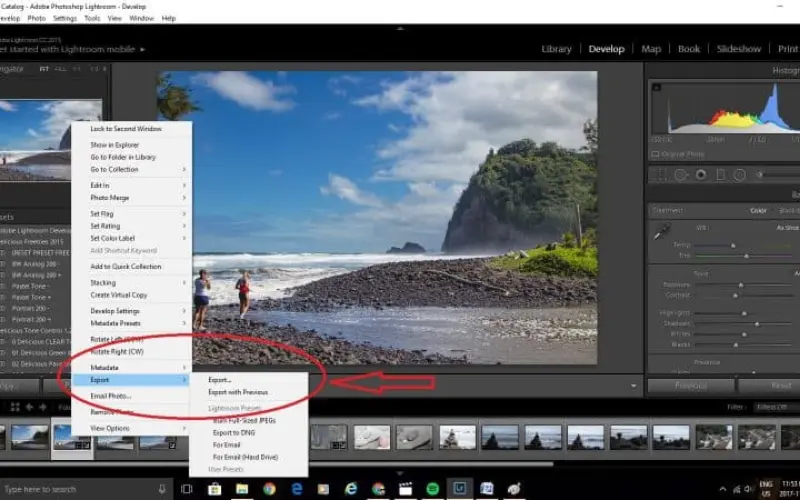
Once you’ve perfected your photos by removing unwanted objects, the final step is exporting them without compromising quality. Here’s how to ensure your edited images look as sharp and professional as possible.
Best Practices for Exporting Photos Without Losing Quality
- Choose the Right File Format: When exporting your photos, opt for formats that maintain high quality, such as TIFF or PNG. While JPEG is more common and takes up less space, it compresses the image, which can lead to a loss of quality.
- Adjust Resolution Settings: Make sure your resolution settings are set to 300 DPI (dots per inch) for print-quality images. If you’re exporting for web use, 72 DPI is sufficient, but always aim for the highest quality possible.
- Use the Highest Quality Setting: When you’re ready to export in Lightroom, slide the quality setting to 100% or choose the “High” or “Maximum” setting. This ensures that your image retains all the details from your edits.
- Avoid Resizing Unless Necessary: Resizing can reduce the sharpness of your image. If you don’t need to change the dimensions, leave the resizing option unchecked. If resizing is necessary, use the “Resize to Fit” option and choose the appropriate dimensions carefully.
How to Avoid Watermarks and Unnecessary Elements
- Turn Off Watermarks: Before exporting, ensure that the “Watermark” option is unchecked in the export settings unless you intentionally want to include one. This step is crucial if you want a clean, professional image.
- Remove Unnecessary Metadata: When exporting, you can exclude certain metadata like camera settings, location, or edit history. This keeps your file size smaller and ensures that only relevant information is attached to your image.
- Disable Overlays: If you’ve used overlays or guides while editing, make sure these are turned off before exporting. This will ensure that they don’t accidentally appear in your final image.
Ensuring HD Quality in Your Final Output
- Export at Full Size: Always export your images at their full size to maintain HD quality. Avoid downscaling as it can lead to a loss of detail, particularly noticeable in HD images.
- Use Sharpening for Output: Lightroom offers an “Output Sharpening” option during export. Select this option and choose “Screen” for web images or “Matte/Glossy” for prints, depending on your needs. This adds a final touch of sharpness that enhances the overall clarity.
- Check the Color Space: Exporting in the sRGB color space is ideal for most web use, as it’s widely supported across devices and platforms. For printing, Adobe RGB or ProPhoto RGB are better for preserving a wider color range.
Conclusion
This guide covered How to Remove Objects in Lightroom using tools like the Healing Brush, Clone Stamp, and Content-Aware Fill. We’ve also explored advanced tips for non-destructive editing and discussed best practices for exporting your photos without losing quality.
The best way to master object removal and other editing techniques in Lightroom is to practice regularly. Don’t be afraid to experiment with different tools and settings—you’ll learn what works best for your photos and develop a workflow that suits your style.





2 Comments